
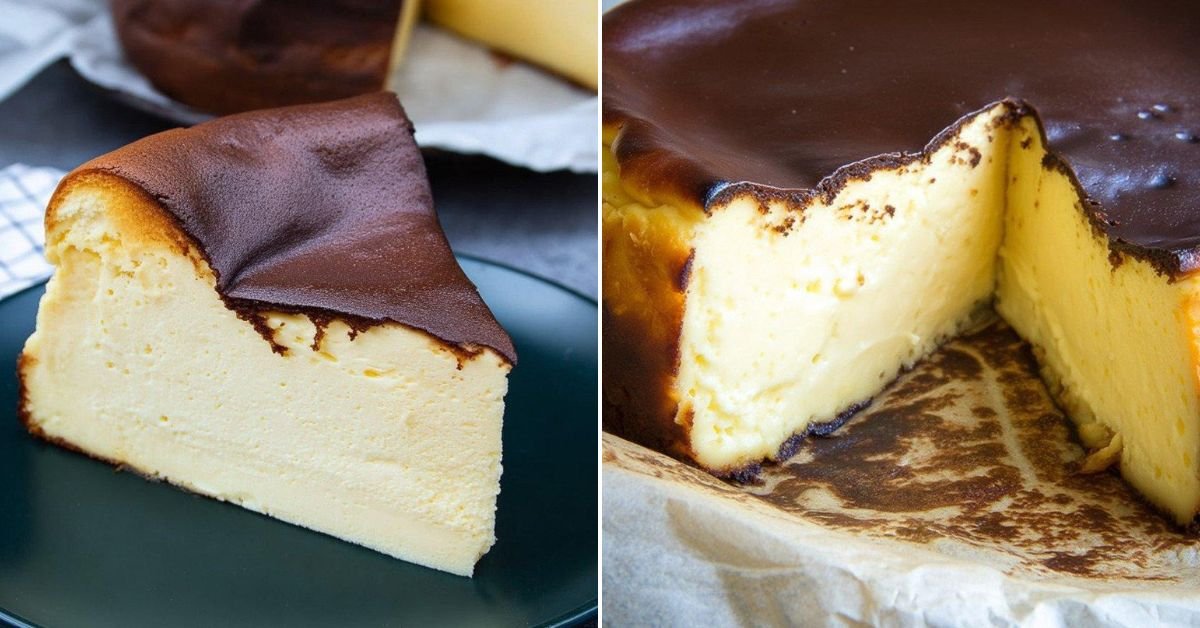
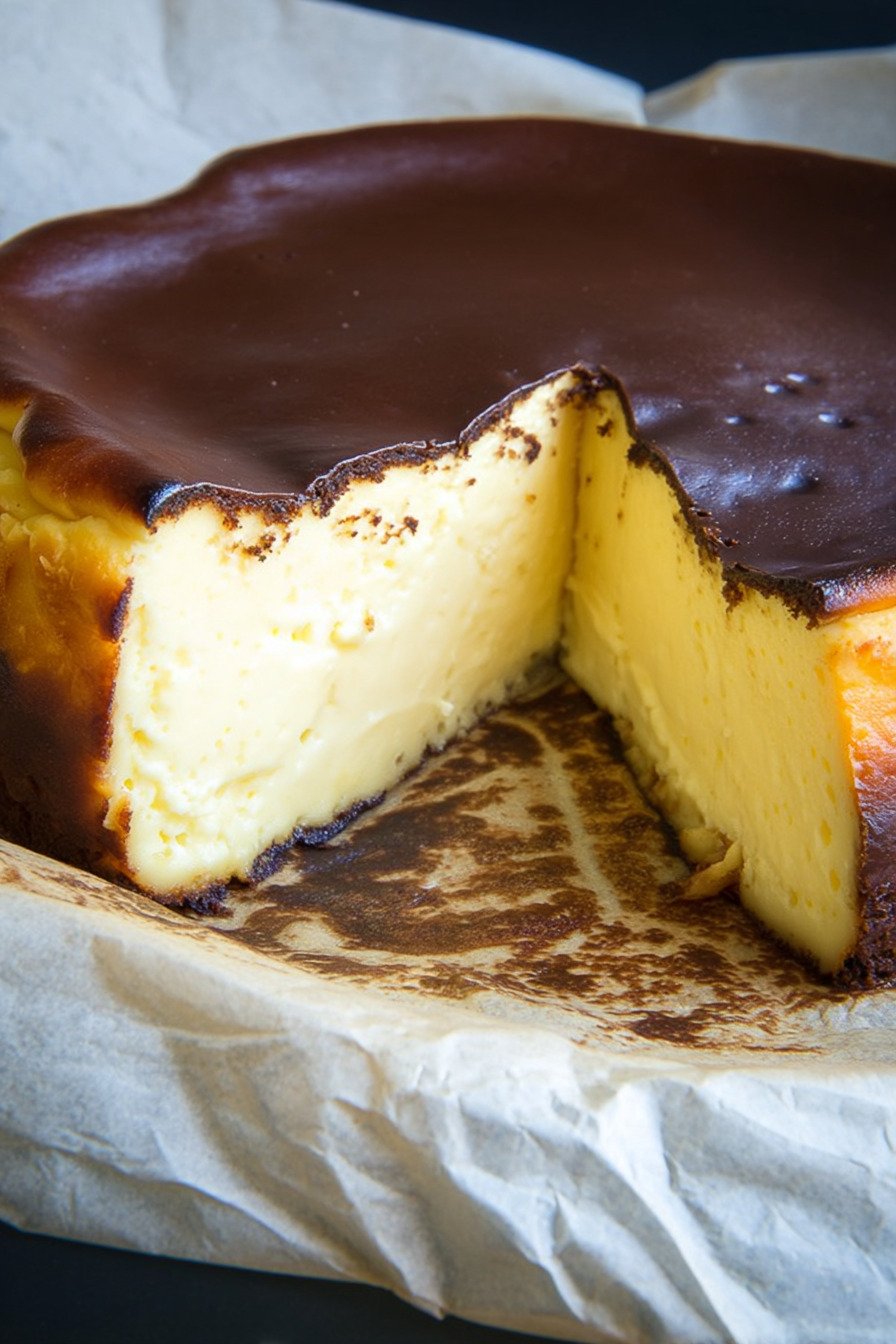
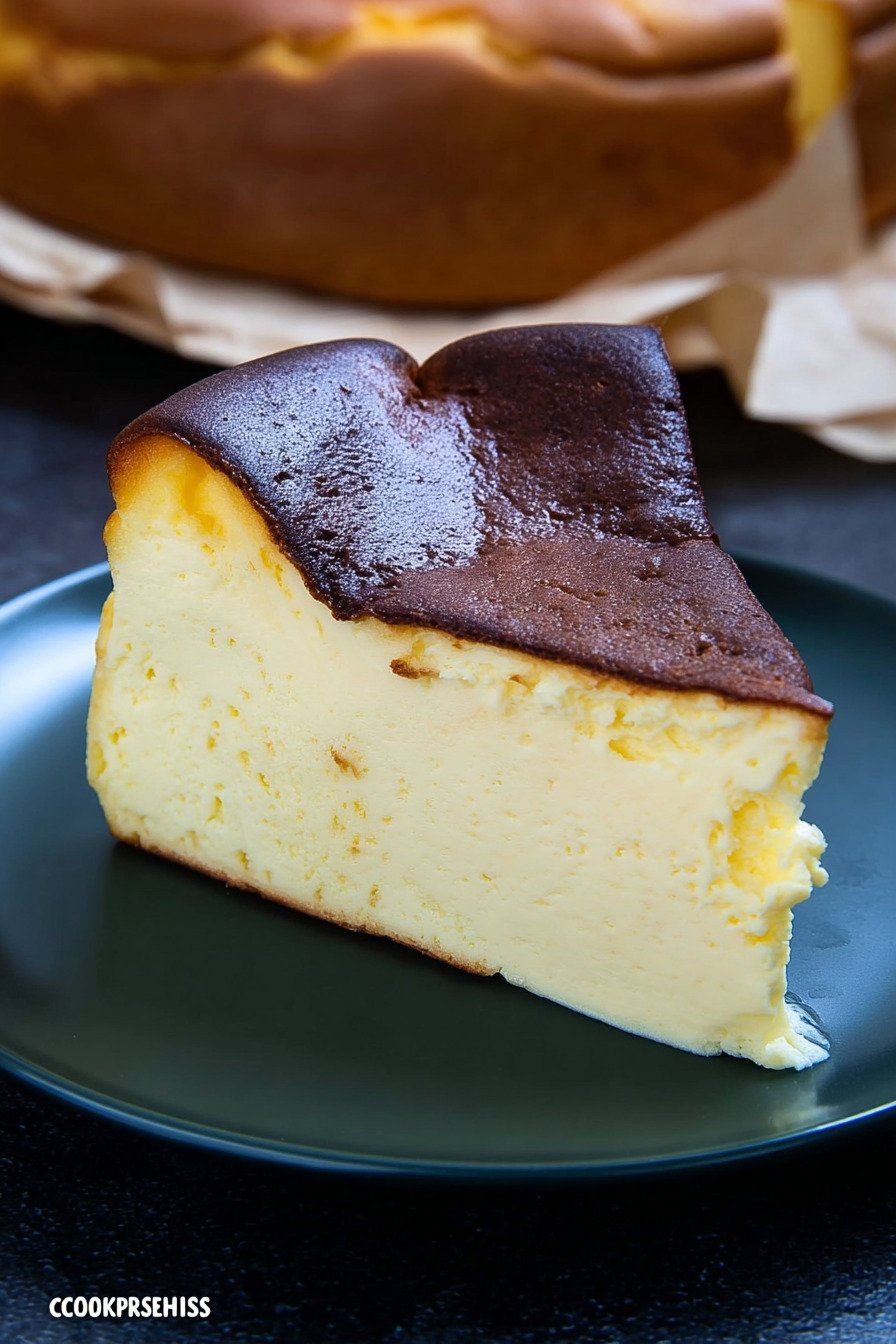
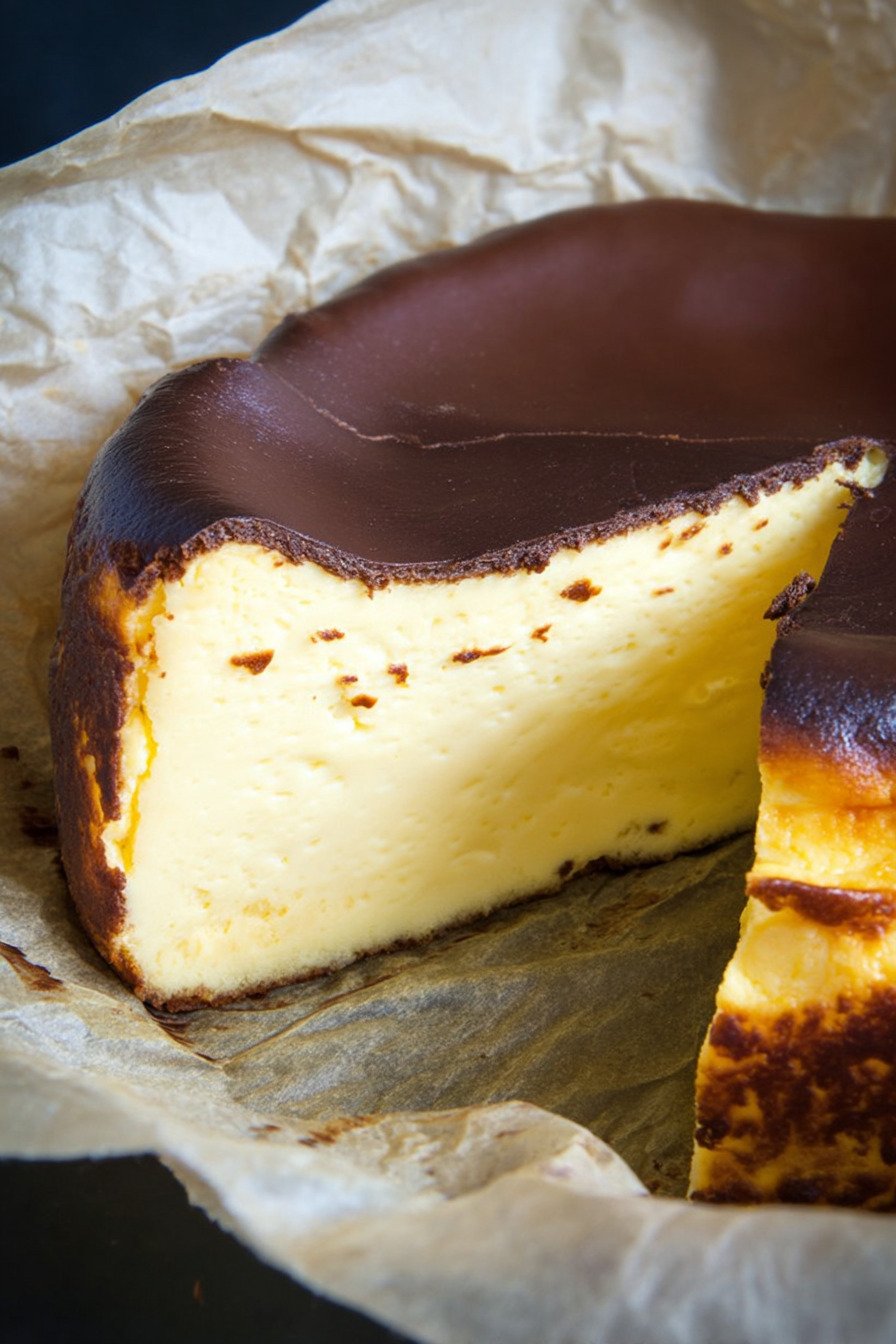
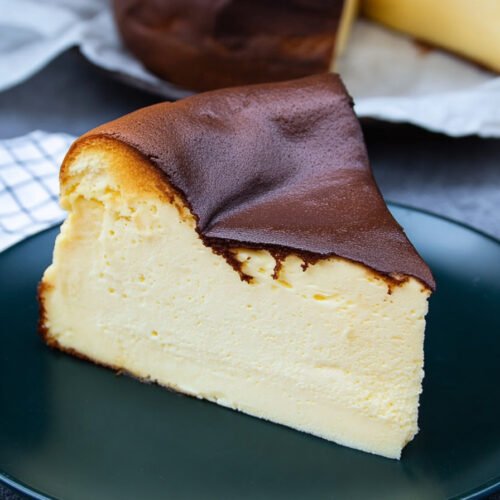
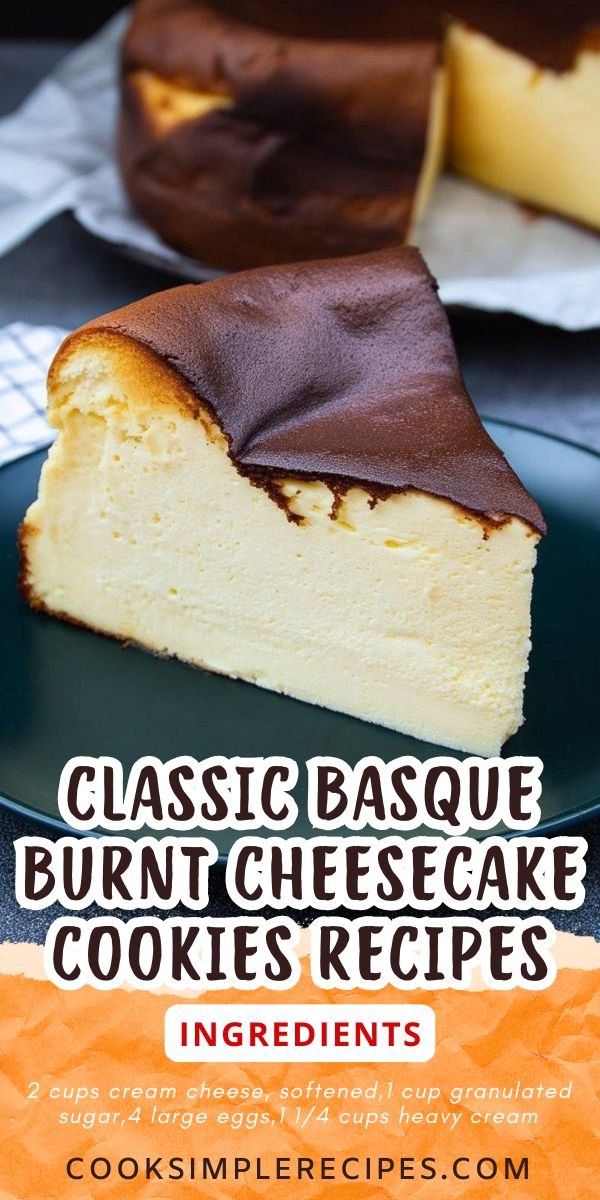
This cheesecake is one of those desserts that makes you pause mid-bite. It’s got that perfect creamy texture that melts on your tongue, and the edges have that beautiful caramelized crust that everyone fights over. I still remember the first time I made it, standing in my kitchen wondering if I’d burned it too much—but that’s exactly the point. It’s supposed to look like it had a little run-in with the oven gods, and that’s where all the flavor magic happens. You don’t need a crust here, which already feels like a win for those of us who tend to snack on graham crackers before the crust even hits the pan. The flavor? Think rich cream cheese mixed with a hint of vanilla, balanced with that slightly bitter, burnt top. It’s rustic, imperfect, and honestly, a little rebellious—like the cool cousin of traditional cheesecake. I love making this recipe when I want something that looks impressive but doesn’t require hours of patience or perfection. It’s the kind of dessert that forgives you for not owning a water bath setup or for eyeballing the ingredients a little. You just mix, bake, and let the oven do its thing. Then, wait as your kitchen fills with that sweet, slightly toasted smell that makes you sneak a peek through the oven door every five minutes.
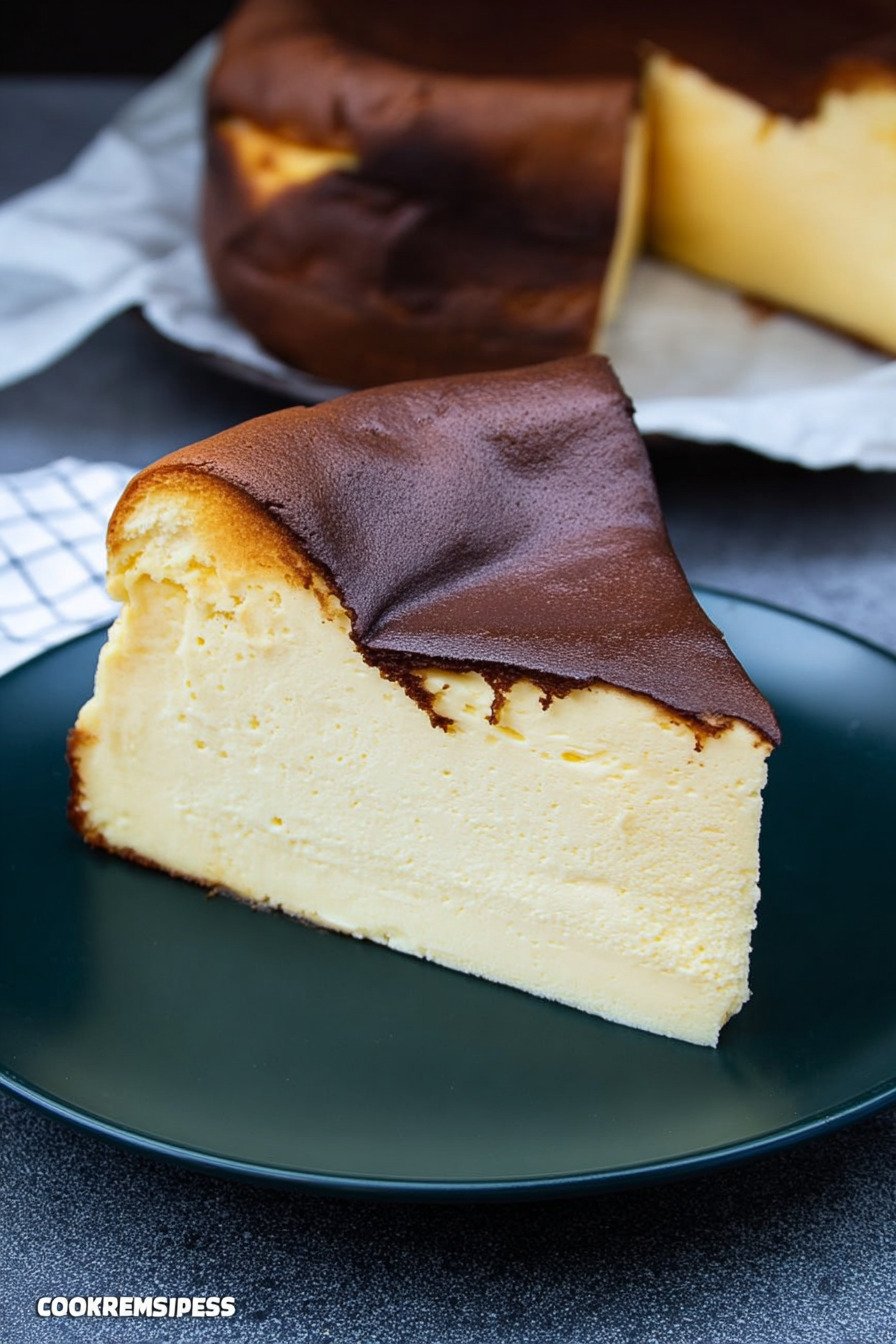
Table of Contents
- 1) Key Takeaways
- 2) Easy Classic Basque Burnt Cheesecake Recipe
- 3) Ingredients for Classic Basque Burnt Cheesecake
- 4) How to Make Classic Basque Burnt Cheesecake
- 5) Tips for Making Classic Basque Burnt Cheesecake
- 6) Making Classic Basque Burnt Cheesecake Ahead of Time
- 7) Storing Leftover Classic Basque Burnt Cheesecake
- 8) Try these dessert recipes next!
- 9) Classic Basque Burnt Cheesecake
- 10) Nutrition
1) Key Takeaways
- This cheesecake is crustless and perfectly caramelized.
- It’s simple to make, yet rich enough to impress anyone.
- It’s creamy inside and slightly burnt on top for balance.
- You don’t need fancy tools—just a whisk, bowl, and oven.
2) Easy Classic Basque Burnt Cheesecake Recipe
I’ll be honest—the first time I made this cheesecake, I thought I had ruined it. The top looked way too dark, and I almost tossed it out. But when I sliced into it, that creamy, dreamy middle convinced me otherwise. The burnt look isn’t a mistake; it’s the whole personality of the Basque burnt cheesecake.
This dessert has a way of being dramatic without even trying. It’s rustic, a little wild, and completely forgiving. You mix everything in one bowl, pour it into parchment, and let the oven do the rest. No crust, no water bath, no stress. Just a golden top and a smooth, custard-like center that makes every bite feel like a little victory.
If you’ve been searching for a recipe that looks impressive but takes almost no effort, this is it. It’s one of my favorite Cheesecake Cookies Recipes because it carries that same creamy sweetness without all the fuss of a traditional cheesecake.
3) Ingredients for Classic Basque Burnt Cheesecake
Cream Cheese: The hero of our cheesecake story. Use full-fat cream cheese for that rich, luscious texture. Let it soften at room temperature so it blends easily.
Sugar: Regular granulated sugar works perfectly. It sweetens the cheesecake and helps create that deep caramel tone on top.
Eggs: Four large ones, added one at a time. They’re what hold everything together and make the filling smooth and glossy.
Heavy Cream: Adds a luxurious, melt-in-your-mouth finish. It keeps the cheesecake soft and silky instead of dense.
Flour: Just a touch—enough to give it structure without making it heavy. You can swap in almond flour if you like a nutty twist.
Vanilla Extract: It’s that quiet background flavor that ties everything together. Use a good one—it’s worth it.
Salt: A tiny pinch wakes up all the other flavors. Never skip it.
4) How to Make Classic Basque Burnt Cheesecake
Step 1: Preheat your oven to 400°F and line a springform pan with parchment. Let it wrinkle and fold naturally—this isn’t about perfection. The edges give that signature rustic look.
Step 2: Beat the cream cheese and sugar together until smooth. Don’t rush. Think of it as the foundation of your cheesecake—it deserves a little patience.
Step 3: Add the eggs, one at a time, mixing slowly after each. You want the texture to stay creamy, not overworked.
Step 4: Pour in the heavy cream, vanilla, and salt. Then sift in the flour and mix just until you get a velvety batter. No lumps, no streaks.
Step 5: Pour it all into the pan and gently tap it on the counter to release any sneaky air bubbles. Into the oven it goes.
Step 6: Bake for about 50 minutes. When it comes out, it should be beautifully bronzed and still a little jiggly in the middle. That’s your cue to stop. Let it cool, then chill it for a few hours before cutting into that creamy center.
5) Tips for Making Classic Basque Burnt Cheesecake
Here’s a little secret—don’t be afraid of the dark top. It’s what gives the cheesecake that rich, smoky sweetness. If you’re nervous, tent it with foil halfway through, but I promise that caramelized layer is worth it.
Keep your ingredients at room temperature before mixing. Cold cream cheese doesn’t play nice—it clumps and ruins that silky batter we’re after. Mix gently and stop as soon as things come together. Overmixing invites cracks, and we’re aiming for smooth elegance here.
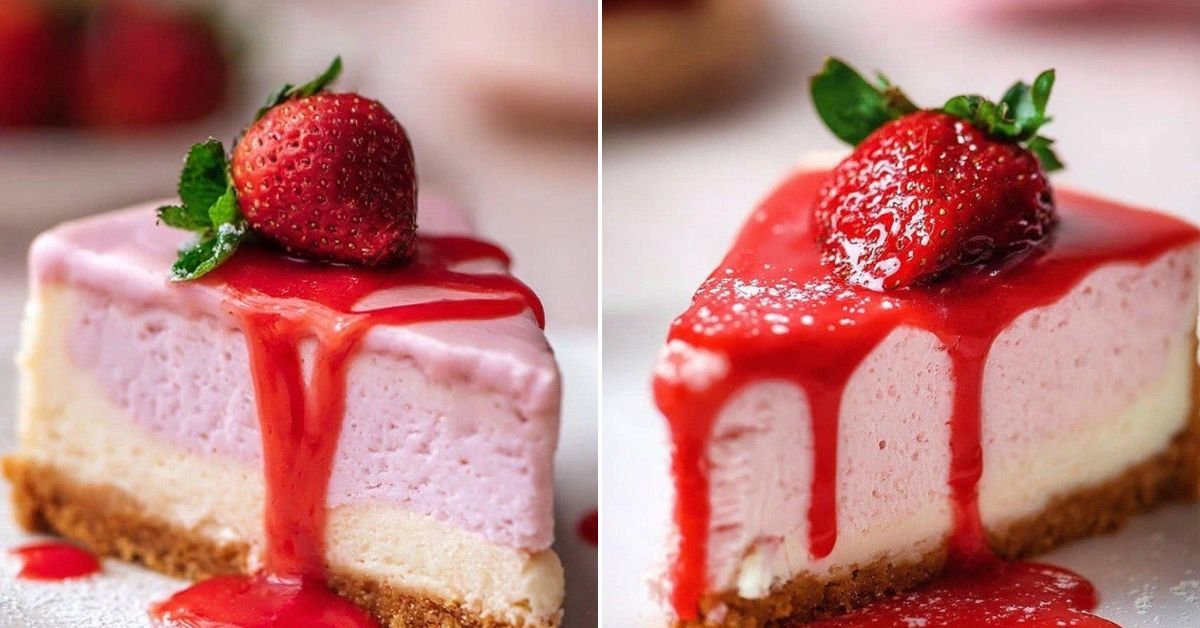
If you want a little fun, add a drizzle of honey or serve it with strawberries. It even pairs beautifully with coffee. And if you’re like me, you might find it hard not to sneak a bite right out of the fridge at midnight.
6) Making Classic Basque Burnt Cheesecake Ahead of Time
This cheesecake gets better with time. Bake it the day before, let it chill overnight, and serve it when it’s had time to set. The flavors mellow, and that burnt top deepens just slightly. I swear, it tastes even more indulgent the next day.
If you’re preparing it for guests, you can bake it two days ahead. Keep it wrapped in parchment inside the fridge. It stays creamy and smooth, and you’ll have one less thing to stress about when company arrives.
It’s the perfect dessert for dinner parties or weekend treats—simple, elegant, and make-ahead friendly. That’s what I love about recipes like this one from Cook Simple Recipes. They’re made for real life, not perfection contests.
7) Storing Leftover Classic Basque Burnt Cheesecake
Once cooled and chilled, store any leftovers in an airtight container. It’ll stay fresh in the fridge for up to four days. If you’re lucky enough to have leftovers, that is. I rarely do.
When you’re ready for another slice, you can enjoy it cold straight from the fridge. Some like to let it rest for ten minutes before eating so it softens a little. Both ways are amazing.
If you want to freeze it, wrap slices in parchment and pop them in a freezer-safe bag. They’ll last up to two months. Defrost overnight in the fridge, and it’ll taste just as luscious as the day you made it.
8) Try these dessert recipes next!

9) Classic Basque Burnt Cheesecake
Classic Basque Burnt Cheesecake Cookies Recipes
Ingredients
- 2 cups cream cheese, softened
- 1 cup granulated sugar
- 4 large eggs
- 1 1/4 cups heavy cream
- 1/4 cup all-purpose flour
- 1 teaspoon vanilla extract
- 1/4 teaspoon salt
Instructions
- Preheat the oven to 400°F and line a 9-inch springform pan with parchment paper, making sure it rises up the sides for that signature rustic look.
- In a large bowl, beat the cream cheese and sugar together until smooth and creamy. Don’t rush this step—it’s the base of your cheesecake dream.
- Add the eggs one at a time, mixing just until combined after each addition.
- Pour in the heavy cream, vanilla extract, and salt, then sift in the flour. Mix until you have a silky, pourable batter.
- Pour the batter into your prepared pan and give it a gentle tap on the counter to pop any air bubbles hiding inside.
- Bake for 50 to 55 minutes, until the top is deeply golden brown and slightly jiggly in the center. It might look overdone, but that’s the magic.
- Let it cool completely in the pan, then chill for at least 4 hours before slicing. Serve cold or at room temperature—both are divine.
10) Nutrition
Serving Size: 1 slice | Calories: 420 | Sugar: 25 g | Sodium: 210 mg | Fat: 30 g | Saturated Fat: 18 g | Carbohydrates: 30 g | Protein: 7 g | Cholesterol: 160 mg


Leave a Comment