
You know what? Sometimes I get home after a long day and the last thing I want is to fuss over dinner. That’s when this beauty comes to the rescue. We’re talking fall-apart tender beef, vegetables swimming in the most incredible gravy, and the kind of comfort that makes you want to curl up on the couch. I’ve made this for my family more times than I can count, and every single time, the pot comes back scraped clean. What I love most is how this recipe works for busy weeknights but looks fancy enough for Sunday dinner. My kids actually fight over the potatoes (not kidding), and my husband always goes back for seconds. The best part? Your Instant Pot does pretty much all the work. If you’re into 1 Pot Meals or looking for the Best Instant Pot Recipe that’s not one of those 3 hour crockpot recipes or All Day Crock Pot Recipes, you’ll love this. Trust me, once you’ve got those Baked Dinner Ideas sorted, this becomes your secret weapon. Some folks even tell me it rivals their Braised Oxtail Recipes for richness and flavor. Whether you’re new to pressure cooking or you’ve been making Instantpot Chicken Recipes forever, this one’s gonna become a staple.
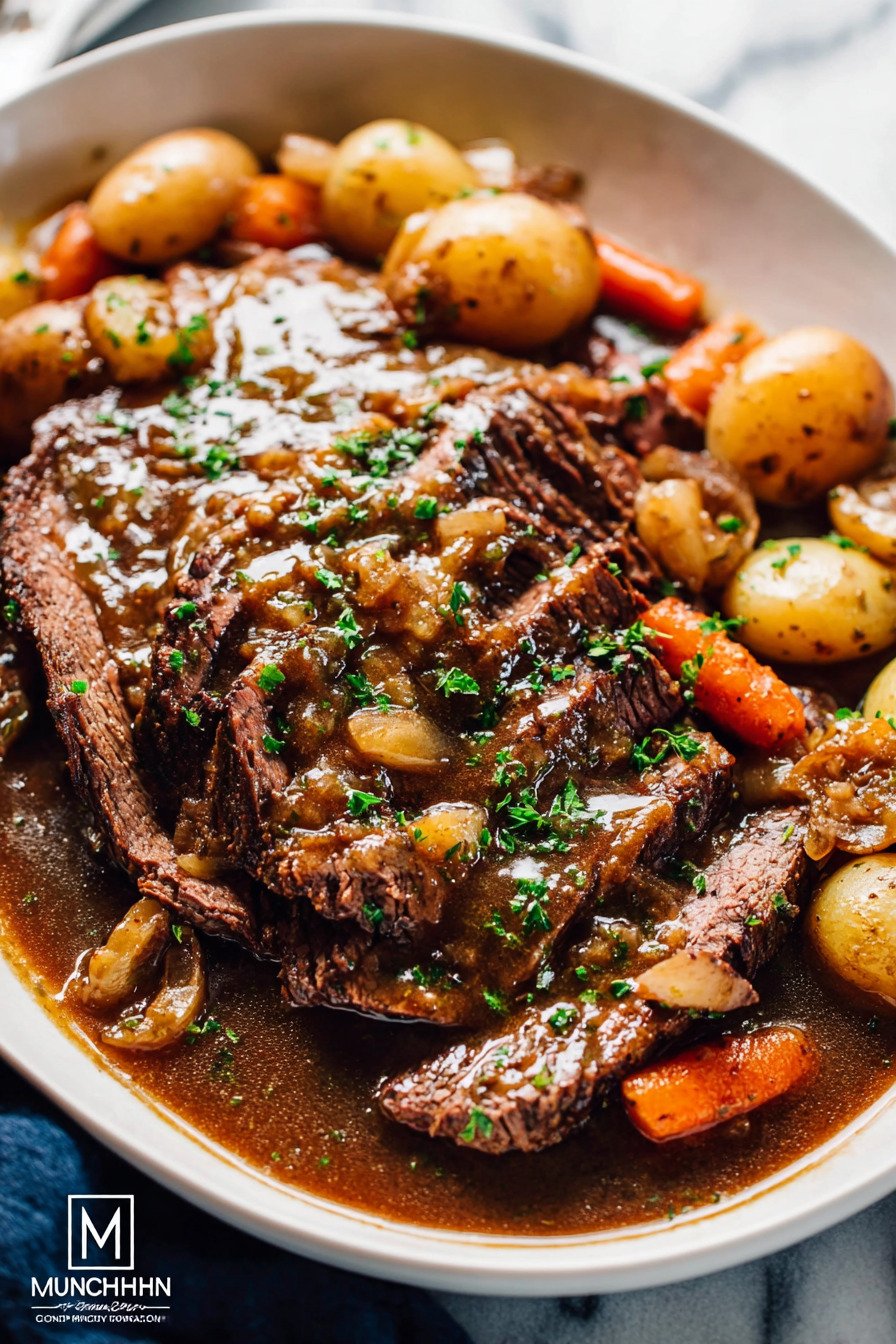
Table of Contents
- 1) Key Takeaways
- 2) Easy Instant Pot Roast Beef and Gravy Recipe
- 3) Ingredients for Instant Pot Roast Beef and Gravy
- 4) How to Make Instant Pot Roast Beef and Gravy
- 5) Tips for Making Instant Pot Roast Beef and Gravy
- 6) Making Instant Pot Roast Beef and Gravy Ahead of Time
- 7) Storing Leftover Instant Pot Roast Beef and Gravy
- 8) Try these Main Course recipes next!
- 9) Instant Pot Roast Beef and Gravy
- 10) Nutrition
1) Key Takeaways
- What cut of beef works best for Instant Pot pot roast?
- How long should you cook beef roast in an Instant Pot?
- Can you cook frozen roast beef in an Instant Pot?
- What’s the secret to tender, fall-apart pot roast?
- How do you thicken gravy in an Instant Pot?
2) Easy Instant Pot Roast Beef and Gravy Recipe
Listen, I’m gonna be real with you. When I first got my pressure cooker, I was scared to death of it. But then I discovered Instantpot Chicken Recipes and similar beef dishes that changed everything. This pot roast became my go-to comfort meal, and now I’m sharing it with you at Cook Simple Recipes. What makes this different from other Instantpot Chicken Recipes I’ve tried? It’s crazy tender without needing to babysit it all day.
We’re talking about meat that literally falls apart when you look at it. The vegetables come out perfectly cooked, not mushy like they get in some 3 hour crockpot recipes. And that gravy? Oh man, it’s the kind that makes you want to lick the plate when no one’s watching. I’ve served this to my pickiest relatives, and they always ask for the recipe.
The beauty of this dish is how hands-off it really is. You brown the meat, toss everything in, and walk away. No stirring, no checking, no worrying. It’s one of those 1 Pot Meals that actually delivers on the promise of being easy. If you’ve been looking through All Day Crock Pot Recipes and thinking “ain’t nobody got time for that,” you’re gonna love this. The Instant Pot cuts your cooking time down to about an hour and a half, total.
I make this at least twice a month now. Sometimes I’ll swap the vegetables around depending on what’s in my fridge, but the basic technique stays the same. My husband says it reminds him of Sunday dinners at his grandma’s house, which is pretty much the highest compliment he can give. And honestly? It might just be the Best Instant Pot Recipe I’ve ever made.
3) Ingredients for Instant Pot Roast Beef and Gravy
Chuck Roast Beef: This is your star player here. Chuck roast has just the right amount of fat running through it, which means it gets super tender under pressure. I always grab a 3-pounder at the store. Make sure it’s not frozen when you start cooking, or your timing will be way off. The marbling in chuck roast is what gives you that melt-in-your-mouth texture everyone raves about.
Olive Oil: You need this for browning the meat. Don’t skip this step, even if you’re tempted. That brown crust isn’t just for looks. It locks in flavor and creates those delicious little bits on the bottom of the pot that make your gravy taste incredible. I use regular olive oil, not the fancy extra virgin stuff, since we’re cooking at high heat.
Onion: One large onion, sliced up nice. I usually cut mine into thick rings so they hold up during cooking. Onions add sweetness and depth to the gravy. My kids pick them out, but I know they’re getting all that good flavor anyway. Yellow onions work great, but sweet onions are nice too if you have them.
Garlic: Three cloves, chopped up fine. Fresh garlic makes such a difference here. Those little jars of pre-chopped garlic just don’t pack the same punch. I’ve learned to keep a bulb of garlic in my kitchen at all times because I use it in everything. The smell when it hits that hot oil? Chef’s kiss.
Montreal Steak Spice: This is my secret weapon. One tablespoon gives you all the seasoning you need without having to measure out five different spices. It’s got that perfect blend of peppery, garlicky, savory flavors. Can’t find it? Any good beef seasoning blend will work. I’ve even used Italian seasoning in a pinch, and it turned out great.
Bay Leaves: Two of these go in for that subtle herby background note. Don’t forget to fish them out before serving. I learned that the hard way when my mother-in-law almost ate one. They’re not harmful, just not pleasant to bite into. They add a warmth to the dish that’s hard to describe but easy to miss if you leave them out.
Chicken Broth: Low sodium is the way to go here because you can always add salt, but you can’t take it away. I use two and a half cups, which gives you plenty of liquid for both cooking and making gravy. Beef broth works too, but I actually prefer chicken broth because it’s lighter and lets the beef flavor shine through.
Soy Sauce: Just one tablespoon, but don’t skip it. This adds umami and depth that makes people wonder what your secret ingredient is. It doesn’t make the dish taste Asian or anything. It just makes everything taste more like itself, if that makes sense. This trick works in all kinds of Baked Dinner Ideas too.
Red Wine: Two tablespoons add richness and a slight tang. Use whatever you’d actually drink. I usually pour from whatever bottle is open in my fridge. If you don’t have wine or don’t want to use it, you can skip it or use a splash of balsamic vinegar instead. The dish won’t suffer too much without it.
Mushrooms: Eight ounces, quartered. These soak up all that beefy, garlicky broth and become little flavor bombs. I buy the pre-sliced ones to save time. Button mushrooms work great, but if you’re feeling fancy, baby bellas add even more depth. My son claims he doesn’t like mushrooms, but he eats them every time I make this.
Carrots: Two carrots, chopped into chunks. I like mine about an inch thick so they don’t turn to mush. Carrots add sweetness and color to the dish. Plus they’re good for you, which makes me feel slightly less guilty about drowning everything in gravy. Peel them or don’t, I’m not judging either way.
Baby Potatoes: One to two pounds of those cute little golden ones. I don’t even peel or chop them. Just wash and toss them in. They come out creamy and perfect every time. These are what my family fights over. I’ve started buying the full two pounds because otherwise, someone’s gonna be disappointed.
Cornstarch Slurry: Five tablespoons of cornstarch mixed with five tablespoons of cold water. This is what transforms your cooking liquid into that gorgeous, glossy gravy. Mix it up in a separate bowl before you add it to the pot. If you add dry cornstarch straight to hot liquid, you’ll get lumps, and nobody wants lumpy gravy.

4) How to Make Instant Pot Roast Beef and Gravy
Step 1: Get your chuck roast out and pat it dry with paper towels. I know this seems picky, but wet meat won’t brown properly, and browning is where the magic happens. Sprinkle salt and pepper generously on both sides. Don’t be shy with the seasoning. This is a big piece of meat, and it needs more than you think.
Step 2: Turn your Instant Pot to saute mode and let it get hot. Add your two tablespoons of olive oil and wait until it shimmers. That’s how you know it’s ready. If you put the meat in too early, it’ll stick and you’ll have a mess. Trust me on this one.
Step 3: Lay that roast in the pot and let it sizzle. Don’t touch it for a full 8 minutes. I know it’s tempting to peek and poke, but leave it alone. You want a deep brown crust. Flip it over and brown the other side for another 8 minutes. Your kitchen will smell amazing right about now.
Step 4: Take the beef out and set it on a plate. Now add your sliced onion to all those browned bits in the pot. Scrape the bottom a little with your wooden spoon to get all that stuck-on goodness mixed in. Cook the onion for about 5 minutes until it softens up and starts to look translucent.
Step 5: Toss in your chopped garlic, Montreal Steak Spice, and bay leaves. Stir it around for just a minute. You want the garlic to get fragrant but not burned. Burned garlic tastes bitter, and we’re not going for that. The smell at this stage is absolutely intoxicating.
Step 6: Pour in your chicken broth, soy sauce, and red wine. Give everything a good stir. Taste the liquid and add more salt and pepper if you think it needs it. Put your beef back in the pot, nestling it down into that aromatic liquid. It doesn’t need to be fully submerged.
Step 7: Close the lid, make sure that little valve is set to sealing, and select the Meat/Stew mode. Cook at high pressure for 45 minutes. When the timer beeps, don’t touch it. Let it naturally release pressure for 25 minutes. I usually set a timer on my phone so I don’t forget. Go do something else, read a book, fold some laundry, whatever.
Step 8: When the 25 minutes are up, carefully open the lid. The steam that comes out is hot, so keep your face back. Remove the beef to a cutting board and slice it up. It should be so tender it almost falls apart on its own. Cover the sliced meat with foil to keep it warm and juicy.
Step 9: Now throw your mushrooms, carrots, and baby potatoes into that beautiful broth in the pot. Put the lid back on and cook at high pressure for just 5 minutes. When it’s done, do a quick release this time. The veggies don’t need a natural release like the meat did.
Step 10: Fish out all those gorgeous vegetables and arrange them on a big serving platter. Layer your sliced beef right on top. This is starting to look like something you’d pay good money for at a restaurant. Switch the Instant Pot back to saute mode.
Step 11: Mix up your cornstarch and cold water in a small bowl until it’s smooth. Pour it into the bubbling broth in the pot. Stir constantly and let it cook for about a minute. You’ll see it thicken right before your eyes. It’s like a magic trick, except it’s science.
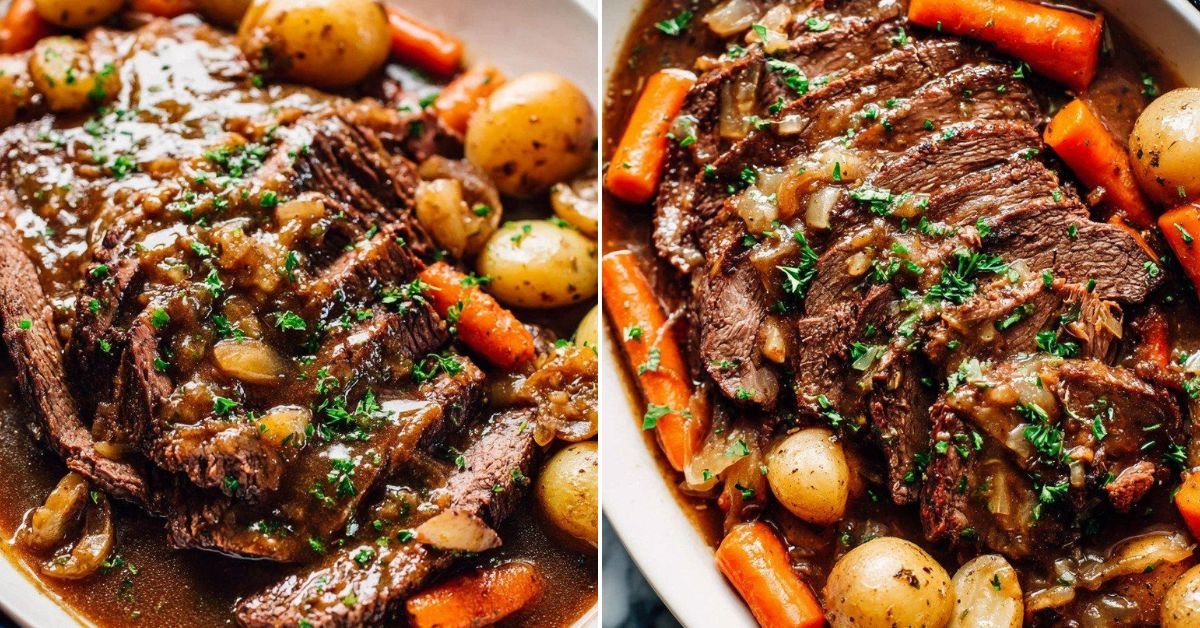
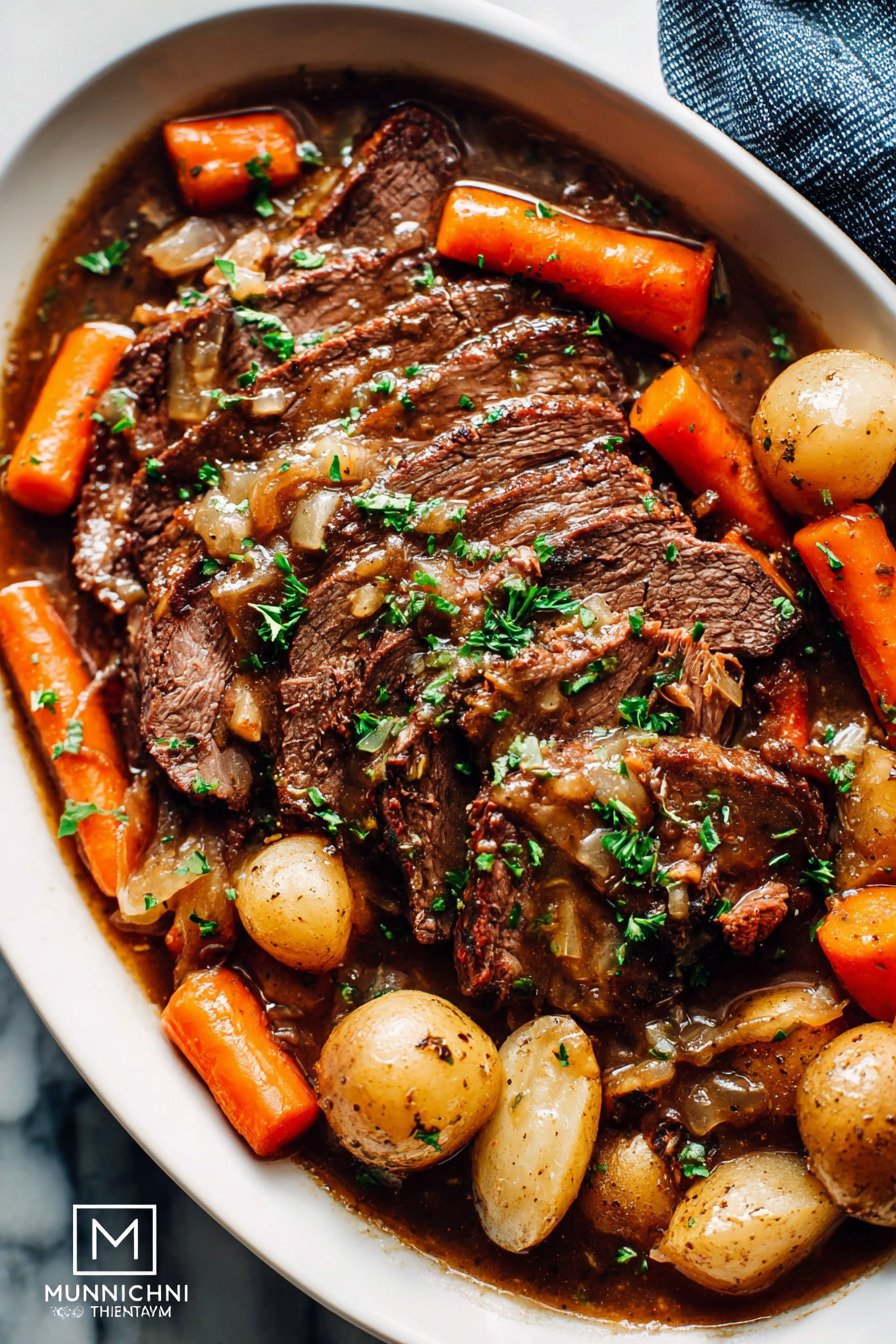
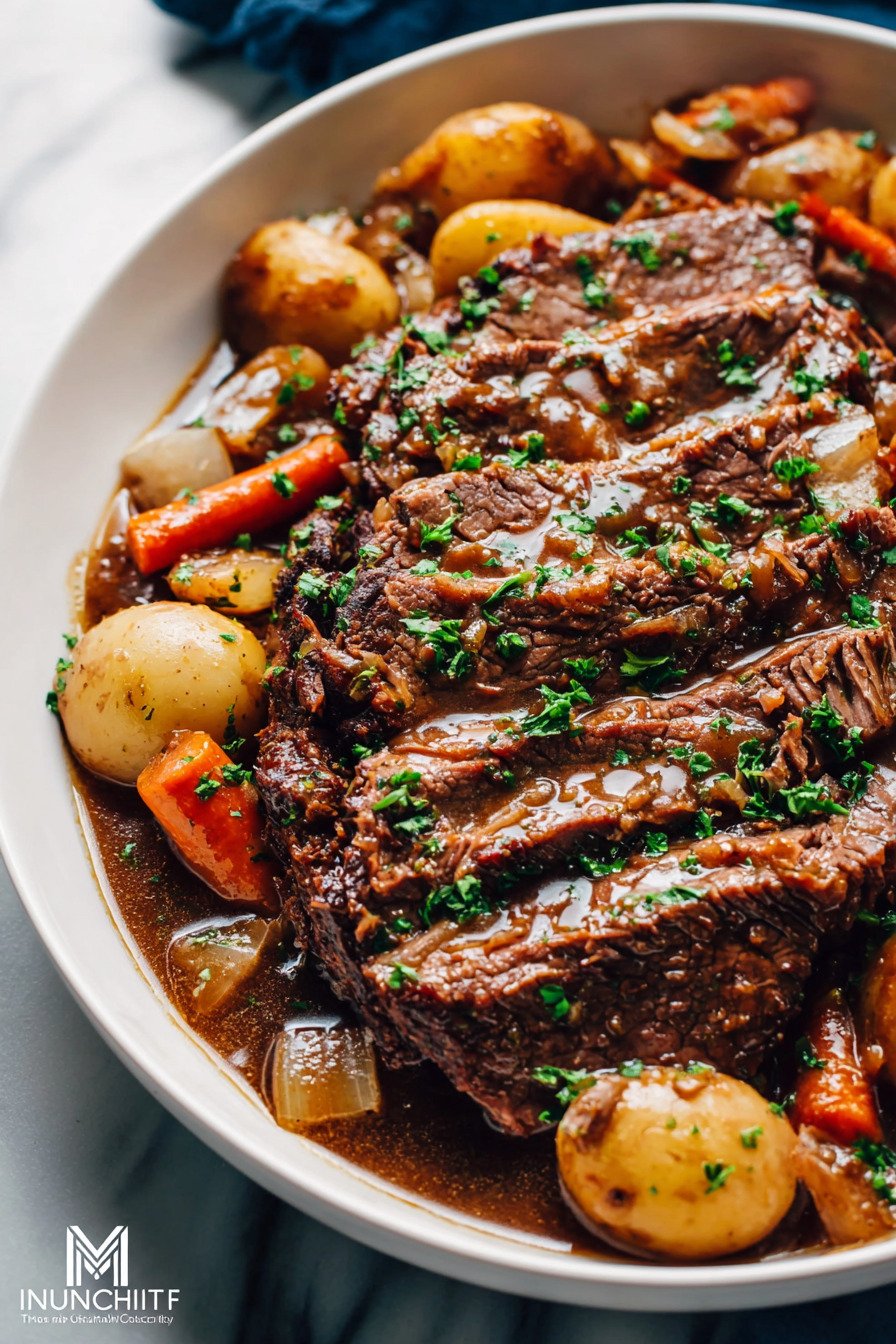
Step 12: Pour that thick, silky gravy all over your beef and vegetables. If you’ve got fresh parsley, chop some up and sprinkle it on top. It makes the whole thing look fancy. Now grab a fork and dig in. You’ve earned it.
5) Tips for Making Instant Pot Roast Beef and Gravy
Don’t rush the browning step. I get it, you’re hungry and you just want to throw everything in and press start. But those 16 minutes of browning the beef are not optional. That caramelization creates flavor compounds you can’t get any other way. It’s the difference between good pot roast and great pot roast. Every time I’ve been lazy and skipped this step, I’ve regretted it.
Let me tell you about natural release versus quick release. For the beef, you absolutely need that 25-minute natural release. If you try to quick release after cooking the meat, all those juices will get forced out and your roast will be dry and tough. The natural release lets everything relax and stay tender. For the vegetables though, quick release is fine. They cook fast and don’t need that resting time.
Your gravy consistency is totally adjustable. Like it thicker? Add another tablespoon of cornstarch to your slurry. Like it thinner? Just use less. I’ve even skipped the thickening step when I’m feeling lazy and just served it with the thin cooking liquid. It’s still delicious. You can’t really mess this up too badly.
Here’s something I learned the hard way. Make sure your sealing ring is clean and properly seated before you start cooking. I once forgot to put the ring back after washing it, and my Instant Pot wouldn’t come to pressure. I sat there for 20 minutes wondering what was wrong before I figured it out. Now I always check before I start.
The size of your roast matters. This recipe is written for a 3-pound roast. If you’ve got a 4 or 5-pounder, you’ll need to add about 15-20 minutes to the cooking time. Smaller roast? Reduce the time by about 10 minutes. When in doubt, it’s better to cook it longer. You can’t really overcook pot roast in a pressure cooker.
6) Making Instant Pot Roast Beef and Gravy Ahead of Time
This is hands down one of the best make-ahead meals in my rotation. I’ll sometimes cook the whole thing a day early, especially if I’m having people over. The flavors get even better after sitting in the fridge overnight. Something about that resting time lets everything meld together in this beautiful way.
Here’s my game plan when I’m making it ahead. I cook the beef and vegetables completely, but I don’t make the gravy yet. I slice the beef, arrange everything in a big baking dish, and pour about half the cooking liquid over it all. Cover it tight with foil and stick it in the fridge. When it’s time to eat, I reheat it in a 325-degree oven for about 30 minutes.
The remaining cooking liquid goes in a separate container in the fridge. When you’re ready to serve, pour it into a saucepan, bring it to a simmer, and thicken it with your cornstarch slurry. Fresh gravy always tastes better than reheated gravy. This method keeps everything tasting like you just made it.
If you want to prep even further ahead, you can brown the meat and cook it with the aromatics up to two days early. Just stop before adding the vegetables. Store the meat in its cooking liquid. When you’re ready to finish, reheat everything in the Instant Pot on saute mode, then add the vegetables and cook them as directed. Works like a charm.
I’ve even frozen the cooked beef and gravy for up to three months. The texture changes slightly, the meat gets a bit stringier, but it’s still really good. Thaw it overnight in the fridge and reheat gently on the stove. This is great for those days when you just cannot deal with cooking but still want a proper meal.
7) Storing Leftover Instant Pot Roast Beef and Gravy
Leftovers are where this recipe really shines. I actually think it tastes better the next day. Store everything in an airtight container in your fridge, and it’ll keep for up to five days. Sometimes I keep the meat and vegetables in one container and the gravy in another. That way, if someone just wants to snack on a piece of beef or grab a potato, they can without getting into the gravy.
When you’re ready to reheat, do it low and slow. I usually put everything in a covered dish and warm it in a 300-degree oven for about 20 minutes. You can also reheat it on the stovetop over low heat, stirring occasionally. The microwave works in a pinch, but the meat can get a little rubbery if you’re not careful. Use 50% power and heat it in short bursts.
The gravy will thicken up in the fridge, which is totally normal. When you reheat it, it’ll loosen back up. If it seems too thick, just add a splash of broth or water and stir it in. If it’s too thin, bring it to a simmer and let it reduce a bit, or whisk in a tiny bit more cornstarch slurry.
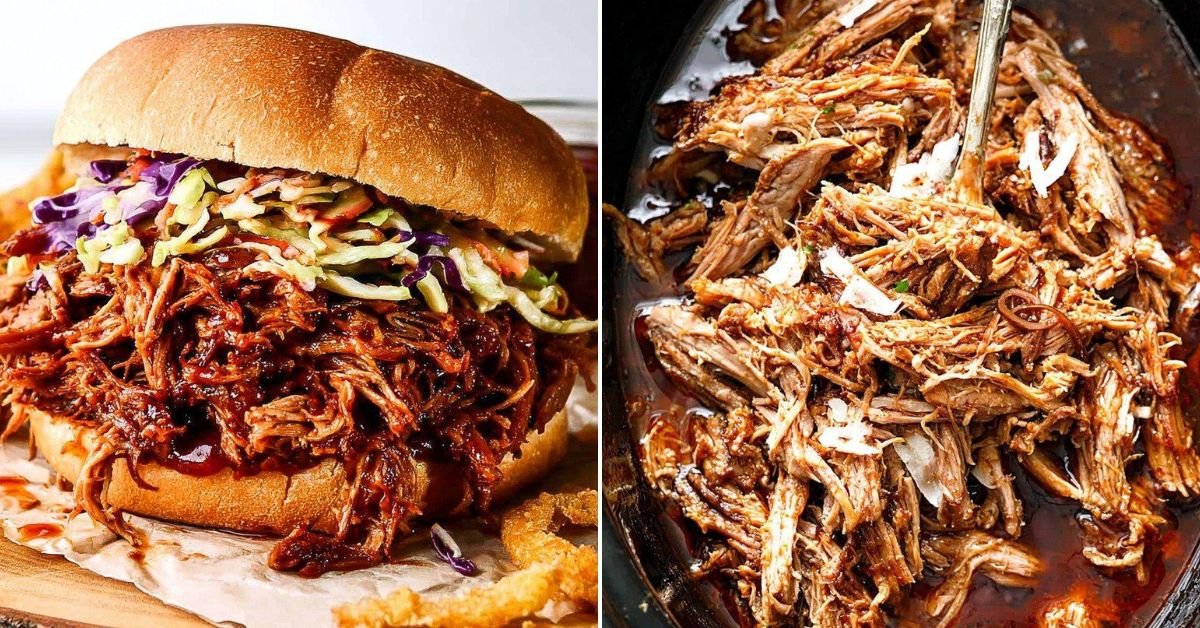
Here’s a fun leftover idea I stumbled onto. Chop up the beef and vegetables, mix them with some of the gravy, and stuff the mixture into a pie crust. Bake until golden and you’ve got yourself a pot roast pot pie. My kids go absolutely wild for this. It’s like getting a whole new meal out of your leftovers.
You can also shred any leftover beef and make the most incredible sandwiches. Toast some crusty bread, pile on the shredded beef, spoon over some hot gravy, and maybe add a slice of provolone. It’s messy and perfect. This is what I make myself for lunch after making this dish, and honestly, it might be my favorite part.
8) Try these Main Course recipes next!

9) Instant Pot Roast Beef and Gravy

Instantpot Chicken Recipes: Tender Roast Beef & Gravy
Ingredients
- 3 lb chuck roast beef (not frozen)
- salt & pepper to taste
- 2 tablespoons olive oil
- 1 large onion, sliced
- 3 cloves garlic, finely chopped
- 1 tablespoon Montreal Steak Spice
- 2 bay leaves
- 2 ½ cups chicken broth (low sodium)
- 1 tablespoon soy sauce
- 2 tablespoons red wine
- 8 oz mushrooms, quartered
- 2 carrots, chopped
- 1 to 2 lb golden baby potatoes
- 5 tablespoons cornstarch mixed with 5 tablespoons cold water
Instructions
- Start by patting your chuck roast dry with paper towels. I know it seems like an extra step, but it really helps get that beautiful brown crust. Season generously with salt and pepper on both sides.
- Turn your Instant Pot to saute mode and let 2 tablespoons of olive oil heat up. You want it nice and hot before the beef goes in.
- Add the chuck roast and let it sizzle away for about 8 minutes per side. You’re looking for that deep brown color that screams flavor.
- Take the beef out and set it aside on a plate. Now toss in your sliced onion and let it soften for about 5 minutes. The smell alone is worth it.
- Add the garlic, Montreal Steak Spice, and bay leaves. Give it a good stir and cook for just a minute until everything smells amazing.
- Pour in the chicken broth, soy sauce, and red wine. Taste it and add more salt and pepper if you think it needs it. Put the beef back in the pot.
- Close the lid, make sure that valve is sealed, and select Meat/Stew mode. Cook on high pressure for 45 minutes, then let it naturally release for 25 minutes. Go relax, you’ve earned it.
- When the timer goes off, carefully remove the beef and slice it up. Cover it with foil to keep it warm.
- Now for the veggies. Add the mushrooms, carrots, and baby potatoes right into that flavorful broth. Close the lid again and cook on high pressure for 5 minutes. Quick release when it’s done.
- Transfer everything to a big serving platter. Your beef goes right on top of those gorgeous vegetables.
- Switch the Instant Pot back to saute mode. Mix your cornstarch and cold water together until smooth, then pour it into the pot. Let it bubble away for about a minute until the gravy thickens up.
- Pour that gorgeous gravy all over your beef and veggies. Sprinkle some fresh parsley on top if you’re feeling fancy, and dig in.
10) Nutrition
Serving Size: 1/8 of recipe | Calories: 386 | Sugar: 2 g | Sodium: 546 mg | Fat: 23 g | Saturated Fat: 9 g | Carbohydrates: 10 g | Fiber: 1 g | Protein: 34 g | Cholesterol: 117 mg


Leave a Comment