
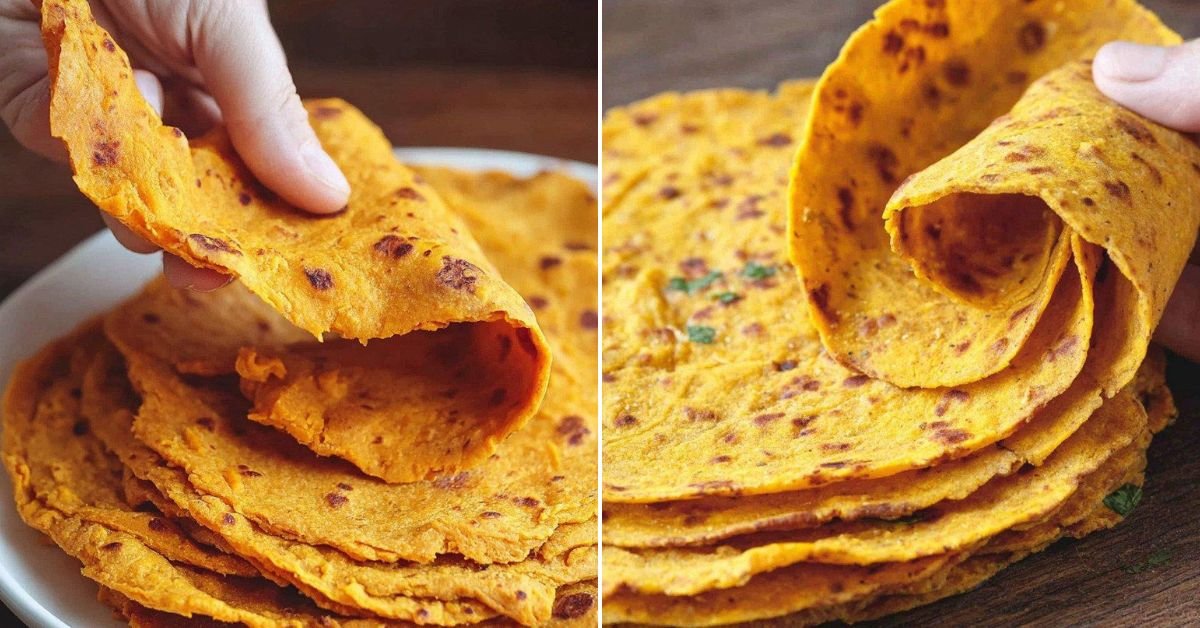
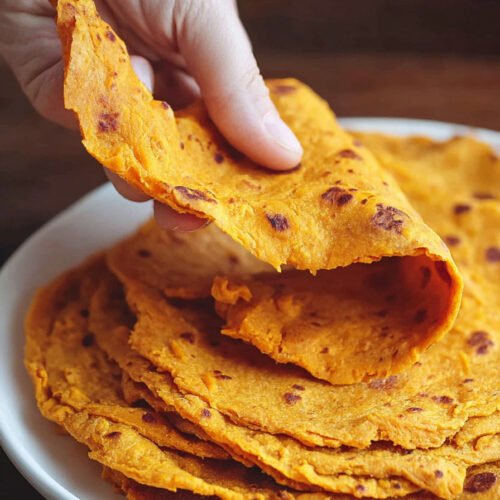
I’m gonna be honest with you. When I first tried making these sweet potato tortillas, I was skeptical. Could mashed sweet potatoes really turn into flexible wraps? Spoiler alert: they absolutely can, and they’re ridiculously good. These gluten free recipes changed my taco nights forever. We’re talking soft, pliable vegan wraps that don’t crack when you fold them (unlike some store-bought disasters I’ve tried). This sweet potato tortilla recipe uses simple ingredients you probably already have. No weird gums or additives. Just real food that happens to be plant based wraps perfection. What I love most? They’re versatile. Load them up for breakfast burritos, pack them for lunch wraps, or go full dinner mode with some grilled veggies. My kids devour these, which tells you everything you need to know. If picky eaters approve, you know you’ve got a winner. Plus, these gluten free vegan recipes work for pretty much any dietary preference. The best part about healthy sweet potato recipes like this one is they taste indulgent but they’re actually good for you. That gorgeous orange color? That’s beta-carotene doing its thing. So go ahead, make a double batch and keep them in your fridge all week.
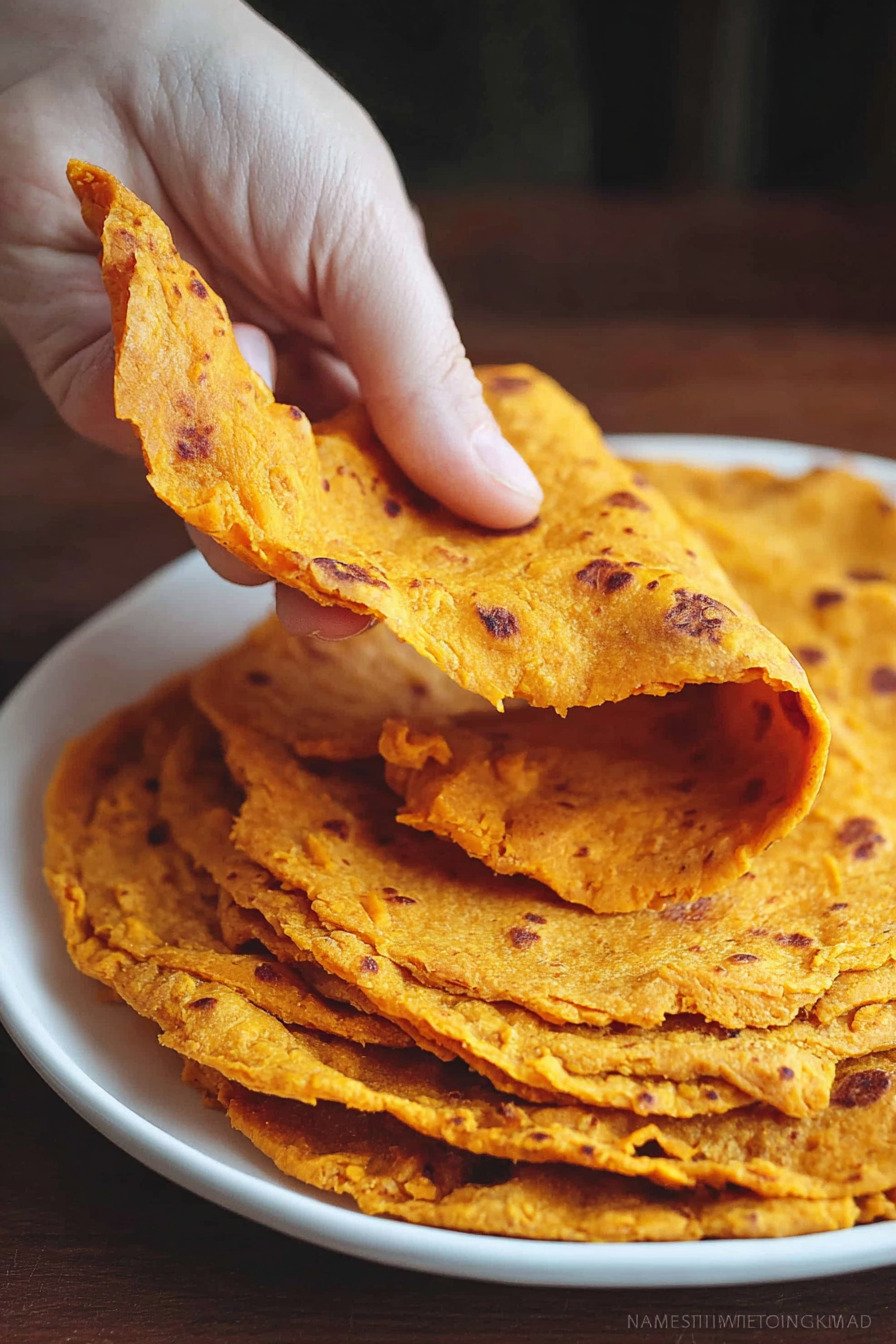
Table of Contents
- 1) Key Takeaways
- 2) Easy Sweet Potato Tortillas Recipe
- 3) Ingredients for Sweet Potato Tortillas
- 4) How to Make Sweet Potato Tortillas
- 5) Tips for Making Sweet Potato Tortillas
- 6) Making Sweet Potato Tortillas Ahead of Time
- 7) Storing Leftover Sweet Potato Tortillas
- 8) Try these Breakfast, Lunch, Dinner next!
- 9) Sweet Potato Tortillas
- 10) Nutrition
1) Key Takeaways
- What makes sweet potato tortillas flexible and soft?
- Can you make these tortillas without gluten free flour?
- How do you keep homemade tortillas from cracking?
- What’s the secret to rolling out sweet potato dough?
- Can you freeze these tortillas for later use?
2) Easy Sweet Potato Tortillas Recipe
Let me tell you something about sweet potato recipes that’ll change your whole wrapping game. When I first stumbled onto making tortillas from sweet potatoes, I thought it sounded way too complicated. Turns out, these are actually easier than driving to the store for those cardboard tasting store bought ones.
The magic happens when you combine mashed sweet potatoes with just a handful of ingredients. No fancy equipment needed. Just your hands, a rolling pin, and about 40 minutes from start to finish. I make these on lazy Sunday afternoons and my family goes absolutely nuts for them. The best part? These gluten free recipes work for everyone at the table, no matter what diet they’re following.
What really sold me on this sweet potato tortilla recipe was how versatile it is. Monday morning breakfast burritos? Check. Tuesday taco night? Double check. Wednesday leftover wrap situation? You got it. These vegan wraps hold up to whatever you throw at them, literally. They don’t split, they don’t tear, and they taste way better than anything you’ll find in the bread aisle.
Here at Cook Simple Recipes, we’re all about making good food without the fuss. These tortillas fit that bill perfectly. They’re one of those plant based wraps that actually taste good enough to eat plain. My kids grab them straight from the stack before I can even fill them. That’s how you know you’ve made something right.

3) Ingredients for Sweet Potato Tortillas
Sweet Potatoes are the star of this show. You’ll need two small ones, which comes out to about a cup when mashed. I like using the regular orange sweet potatoes, not the white ones. Steam or boil them until they’re super tender. You want them so soft that your fork glides right through. The natural sweetness and smooth texture is what makes these tortillas so dang good. Plus, that gorgeous orange color makes them look way more appetizing than plain flour tortillas.
Vegan Butter adds richness and keeps things soft. I’m obsessed with Miyoko’s brand, but any vegan butter works great here. If you’re not plant based, regular butter or ghee works just fine too. Some folks use olive oil instead, which is totally fine, but I think butter gives you better flavor. You only need about 2 tablespoons, so don’t stress about it too much. The fat content helps these tortillas stay pliable instead of cracking when you fold them.
Gluten Free Sourdough Starter might sound fancy, but hear me out. If you’ve got one bubbling away in your fridge, this is a perfect way to use it. The tangy flavor it adds is chef’s kiss. But if you don’t have one, no worries at all. Just mix rice flour with warm water until it looks like thick pancake batter. I’ve done it both ways and they both turn out great. The sourdough just adds an extra layer of flavor that makes people ask what your secret is.
Psyllium Husk is the secret weapon that makes these gluten free vegan recipes actually work. This stuff acts like glue, holding everything together without any actual gluten. You only need 2 teaspoons, but don’t skip it. I tried making these without it once and ended up with a crumbly mess. Psyllium gives you that stretchy, bendy quality that makes a tortilla actually usable. You can find it at any health food store or just order it online.
Arrowroot Flour helps bind everything together with its super fine texture. If you can’t find arrowroot, tapioca flour or cassava flour work just as well. I keep all three in my pantry and rotate through them. Each one gives a slightly different texture, but they all work. Start with 2 tablespoons and add more if needed. Your dough should feel like cookie dough, not sticky and not too dry. Finding that sweet spot makes rolling them out so much easier.
Seasonings make these tortillas taste like actual food instead of bland cardboard. We’re talking sea salt, garlic powder, onion powder, and a little black pepper. Nothing crazy, just enough to give them flavor. I’ve experimented with adding cumin or smoked paprika, and those are delicious too. The seasonings get mixed right into the mashed sweet potato, so the flavor goes all the way through. Don’t be shy with the salt here. It makes a bigger difference than you’d think.
4) How to Make Sweet Potato Tortillas
Step 1 is getting those sweet potatoes cooked and mashed up. Pop them in a steamer basket or just boil them in a pot of water for about 15 to 20 minutes. You’ll know they’re done when a fork slides in without any resistance. Drain them, let them cool for just a minute, then mash them really well. No chunks allowed here. You want it smooth as baby food. Take out exactly 1 cup of the mashed sweet potato and put it in a bowl.
Step 2 involves mixing your sweet potato mash with all the good stuff. Add that tablespoon or two of hot water from your steamer, the vegan butter, and all your seasonings. Stir it up until everything’s combined and smooth. The hot water helps the butter melt in evenly. Let this mixture cool down to room temperature before moving on. If it’s too hot, it’ll mess with your other ingredients later. I usually make this part first and let it sit while I clean up the kitchen.
Step 3 is where we build the actual dough. Grab your sourdough starter from the fridge and measure out 3/4 cup. Or if you’re using the rice flour substitute, mix that up now. Add the psyllium husk and your cooled sweet potato mixture. Mix it all together and then just let it sit there covered for 10 minutes. This step is super important. The psyllium needs time to absorb all the moisture and do its magic. Go check your phone, make some coffee, whatever. Just give it those 10 minutes.
Step 4 is when you add the arrowroot flour and optional baking powder. Start with 2 tablespoons of arrowroot and see how it feels. You want cookie dough consistency. If it’s too wet, add another tablespoon. If it feels perfect, stop there. The baking powder makes them puff up a little when cooking, which I like, but you can totally skip it. Don’t add too much flour or you’ll end up fighting with tough dough that doesn’t want to roll out thin.
Step 5 requires getting your skillet nice and hot. Put it over medium heat and let it preheat for a good 5 to 7 minutes. I use a ceramic nonstick pan and it works perfectly. Cast iron works great too if that’s what you’ve got. You want it hot enough that a drop of water sizzles when it hits the pan. Not smoking hot, just good and ready. This preheating step makes sure your tortillas cook evenly and get those pretty brown spots.
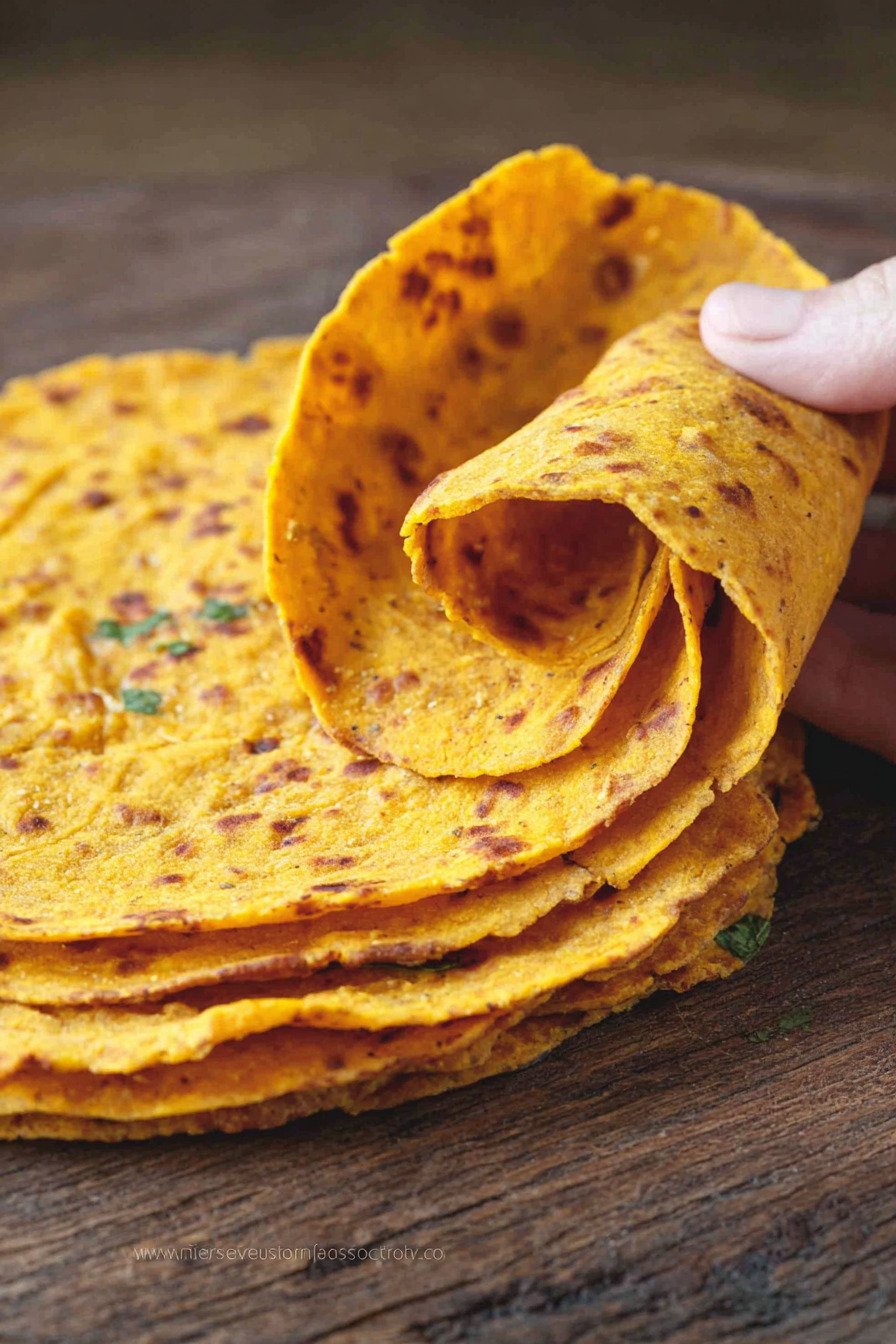
Step 6 is the fun part. Divide your dough into 5 equal pieces and roll them into balls. Keep the ones you’re not working with covered under a damp towel so they don’t dry out. Take one ball and put it between two pieces of parchment paper. Roll it out as thin as you can get it without tearing. The thinner they are, the more flexible they’ll be. I aim for about the thickness of a credit card, maybe slightly thicker.
Step 7 is the transfer to the pan, which sounds scary but it’s actually easy. Peel off the top piece of parchment paper. Then pick up the tortilla with the bottom paper still attached and flip it directly onto your hot skillet. The dough side goes down. Wait about 10 to 15 seconds, then slowly peel off that bottom piece of parchment. It should come off clean. If it sticks a tiny bit, rub a little oil on the paper first next time.
Step 8 is just cooking them through. Each side takes about 30 to 45 seconds. You’ll see some light brown spots appear when it’s ready to flip. Use a spatula and flip it over gently. Cook the other side until it’s got those same brown spots. Don’t walk away during this part. These cook fast and you don’t want them to burn. Stack them up as you go and keep them covered with a clean kitchen towel. This keeps them soft and warm.
5) Tips for Making Sweet Potato Tortillas
Get your measurements right with the sweet potato. One cup of mashed sweet potato sounds simple enough, but pack it down when you measure. Not super tight, just make sure there aren’t big air pockets. Too much sweet potato and your dough gets sticky. Too little and it’s dry and cracks. I learned this the hard way after making a batch that fell apart every time I tried to fold them. Now I always level off my measuring cup with a knife to make sure it’s exact.
Rolling between parchment paper saves your sanity. Trust me on this one. I tried using a floured surface once and it was a disaster. The dough stuck to everything, my counter, my rolling pin, my hands. Parchment paper makes the whole process smooth and easy. You can reuse the same two pieces for all five tortillas too. Just wipe them off if they get too much flour residue on them. It’s one of those small tips that makes a huge difference in how the whole process goes.
Temperature matters more than you think. Your skillet needs to be at that perfect medium heat sweet spot. Too hot and the outside burns before the inside cooks. Too cool and they come out tough and chewy. I keep mine right around setting 5 or 6 on my stove dial. If you see smoke, you’ve gone too hot. If the tortilla sits there for a minute without getting any color, bump up the heat. After your first one, you’ll know exactly where your stove likes to be.
Don’t skip the resting time after mixing in the psyllium. Those 10 minutes make the difference between dough that rolls out beautifully and dough that fights you every step of the way. The psyllium needs time to absorb all the moisture and bind everything together. I set a timer on my phone so I don’t forget. You can prep your parchment paper and get your skillet heating during this time. Makes the whole process move along smoothly.
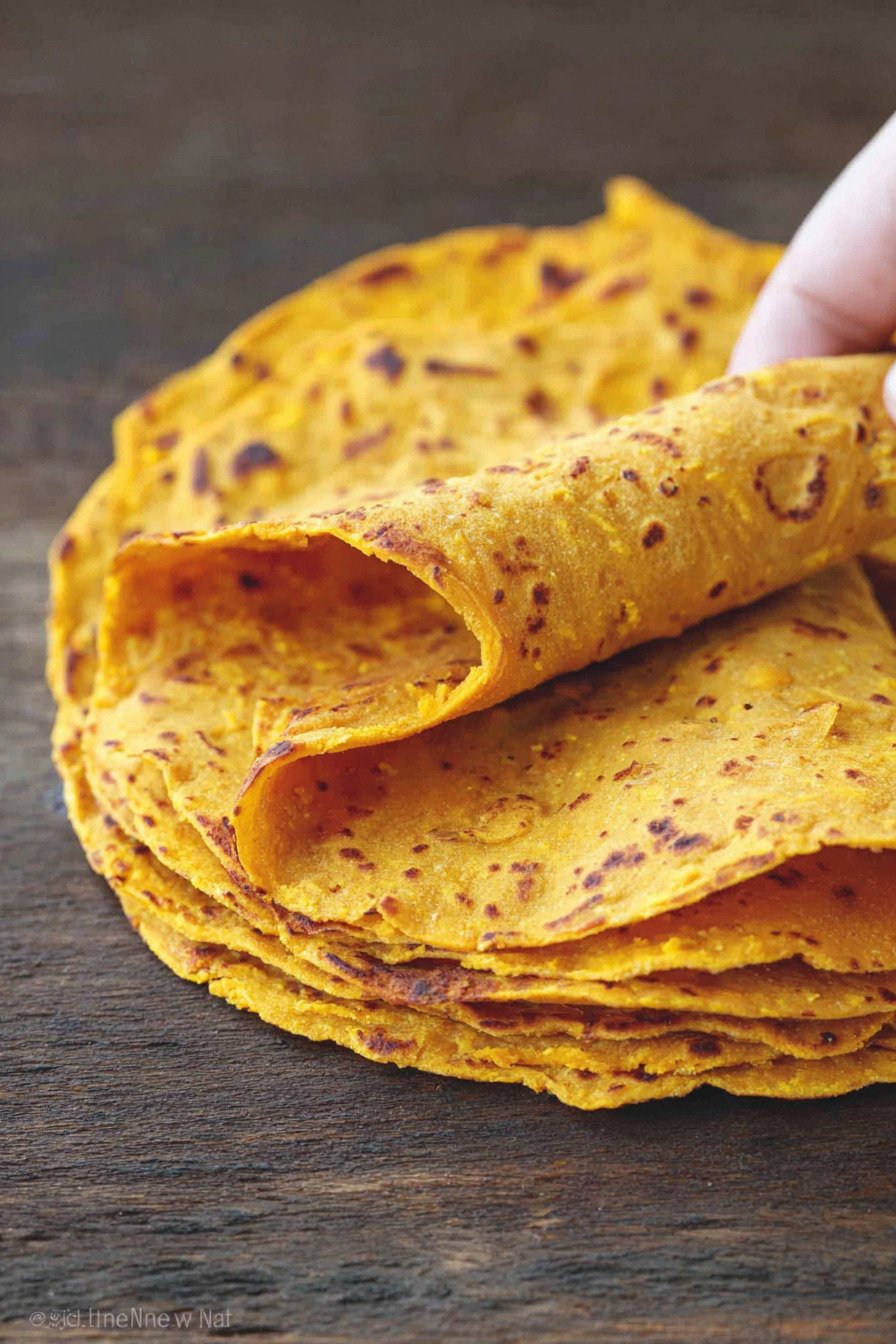
Keep your finished tortillas covered and warm. As soon as one comes off the skillet, stack it with the others and cover the whole pile with a clean kitchen towel. This traps the steam and keeps them soft and pliable. If you leave them uncovered, they dry out and get stiff. I learned this making my first batch when I laid them all out on the counter to cool. They turned into sweet potato frisbees. Now I always keep them covered until we’re ready to eat.
6) Making Sweet Potato Tortillas Ahead of Time
These healthy sweet potato recipes are perfect for meal prep Sunday. I make a double batch and use them all week long. The dough itself doesn’t store well once mixed, so I don’t recommend making that ahead. But you can definitely cook all the tortillas in one go and store them. They actually taste better the next day after all the flavors have had time to hang out together. The sweet potato flavor gets richer and more developed.
If you want to prep ingredients ahead, cook and mash your sweet potatoes the night before. Store the seasoned mash in an airtight container in the fridge. When you’re ready to make tortillas, let it come to room temperature first. Cold sweet potato doesn’t mix well with the other ingredients. You can also measure out all your dry ingredients and have them ready to go. This way, when you’re ready to cook, it only takes about 20 minutes from start to finish.
Another trick I use is making the whole batch of tortillas on the weekend. Once they’re cooked and cooled, I stack them with pieces of parchment paper between each one. This keeps them from sticking together. Then I slide the whole stack into a gallon ziplock bag and keep it on the counter. They stay soft and fresh for 3 to 4 days this way. Every morning, I just grab however many I need for lunches or breakfast burritos.
For longer storage, freeze them. Seriously, these freeze like a dream. Use the same parchment paper method, but put them in a freezer bag instead. They’ll keep for up to 3 months. When you want to use them, just pull out what you need and let them thaw at room temperature for about 30 minutes. Or if you’re in a hurry, microwave them for 15 to 20 seconds. They come back to life like you just made them fresh.
7) Storing Leftover Sweet Potato Tortillas
Storage is where people usually mess up homemade tortillas. The key is keeping them from drying out. As soon as your tortillas are cool, transfer them to a ziplock bag. Press out as much air as you can before sealing. The less air, the softer they stay. I keep mine right on the counter, not in the fridge. Room temperature is perfect for these. They stay soft and flexible for 3 to 4 days easily.
If you put them in the fridge, they get stiff and weird. The cold temperature changes the texture of the sweet potato and makes everything firm up too much. I made this mistake with my first batch and ended up having to reheat each one before I could use it. Save yourself the hassle and just keep them at room temperature. They don’t have any ingredients that need refrigeration, so they’re totally safe sitting out.
When you’re ready to use a stored tortilla, you might want to warm it up just a bit. I throw mine in a dry skillet for about 10 seconds per side. This brings back that fresh-off-the-stove softness. You can also wrap them in a damp paper towel and microwave for 10 to 15 seconds. Either way works great. The little bit of heat makes them extra pliable for rolling up your fillings.
For freezing, I already mentioned the parchment paper trick. But here’s another tip. Label your freezer bag with the date. I thought I’d remember when I made them, but three weeks later I was standing there wondering if they were still good. Frozen tortillas last about 3 months. After that, they’re still safe to eat but the texture starts to go downhill. Thaw them at room temp or give them a quick zap in the microwave. They’re perfect for those nights when you need dinner on the table fast.
8) Try these Breakfast, Lunch, Dinner next!
9) Sweet Potato Tortillas
Sweet Potato Recipes: Flexible Gluten Free Vegan Tortillas
Ingredients
Sweet Potato Mash
- 2 small sweet potatoes, steamed or boiled and mashed
- 2 tablespoons vegan butter (I use Miyoko’s) or mild cooking oil
- 1 to 2 tablespoons hot water from steamer
- 3/4 teaspoon sea salt
- 1/2 teaspoon onion powder
- 1/2 teaspoon garlic powder
- Dash of black pepper
Tortilla Dough
- 3/4 cup gluten free sourdough starter (see notes for substitute)
- 2 teaspoons psyllium husk
- 2 to 3 tablespoons arrowroot flour (or tapioca flour)
- 1/2 teaspoon baking powder (optional, for puffier tortillas)
Instructions
Prepare the Sweet Potatoes
- Steam or boil your sweet potatoes for about 15 to 20 minutes until they’re nice and tender. You should be able to easily pierce them with a fork.
- Mash them up and take out 1 cup of the mashed sweet potato. Add the hot water, vegan butter, and all your seasonings. Mix until smooth and let it cool down a bit.
Make the Dough
- Grab your sourdough starter from the fridge and measure out 3/4 cup. Put the rest back for another recipe.
- If you don’t have sourdough starter, mix 3/4 cup brown or white rice flour with 1/2 cup warm water or plant milk until you get a similar consistency.
- Add the psyllium husk and your cooled sweet potato mixture. Stir well and let it sit covered for 10 minutes. The psyllium needs this time to absorb the moisture.
- When you’re ready to cook, mix in the arrowroot flour and baking powder. Your dough should look like cookie dough. Don’t go overboard with the flour or your tortillas will be dry and hard to roll.
Cook Your Tortillas
- Heat up your skillet over medium heat (about 5 to 6 on the dial) for 5 to 7 minutes. A non-stick ceramic pan works great here.
- Divide your dough into 5 equal balls. Keep the ones you’re not working with covered so they don’t dry out.
- Place one ball between two pieces of parchment paper and roll it out as thin as you can get it.
- Peel off the top layer of parchment and flip the tortilla directly onto your hot skillet. Wait about 10 to 15 seconds, then slowly peel off the other piece of parchment. Use a tiny bit of oil if it’s sticking.
- Cook each side for about 30 to 45 seconds. You’ll see some light brown spots when they’re ready.
- Stack your finished tortillas and keep them covered so they stay soft and warm.
10) Nutrition
Serving Size: 1 tortilla, Calories: 149, Sugar: 2.1 g, Sodium: 361 mg, Fat: 4.7 g, Saturated Fat: 0.8 g, Carbohydrates: 27.9 g, Fiber: 3.2 g, Protein: 2.5 g, Cholesterol: 0 mg


Leave a Comment